Showing posts with label Vegetables. Show all posts

Tuesday, November 25, 2014

Corn Pudding

Thanksgiving is only two days away and I'm prepping like a mad woman! Today's recipe is a long-time and childhood favorite of mine. It's corn pudding and it's sure to win over anyone. It's a simple dish that is perfect for a last minute side to your Thanksgiving feast. Because what Turkey Day meal doesn't include some type or corn dish?! And this one certainly doesn't disappoint!

  • What You'll Need
    • 1 can evaporated milk
    • 1 can creamed corn
    • 2 cans whole corn, drained
    • 1/4 stick butter, melted
    • 1/4 cup sugar
    • 3 TBSP cornstarch
    • 1/2 TSP salt
    • 2 eggs

  • What You'll Do
    • Mix the sugar, cornstarch, and salt together.
    • Beat in the eggs, then add the evaporated milk, creamed corn, whole corn, and melted butter. Mix well.
    • Put in a greased glass casserole dish and bake for one hour at 350°.


Monday, November 17, 2014

Sweet Potato Casserole

Since Thanksgiving is next week I'm starting to round up some of my favorite Thanksgiving Day dishes. Because husband and I now celebrate/host Thanksgiving at our house, we have two Thanksgivings to enjoy, the first being at my parents' home the Sunday before Turkey Day. So we make completely different dishes at our house than the more traditional ones my mom whips up.

Today I am sharing one of my mom's specialties. She's been making this super delicious sweet potato casserole since I was a little girl. And she's converted some non-sweet potato lovers with it. Which means you should probably make it!

  • What You'll Need
    • 3-4 large sweet potatoes
    • Cinnamon
    • Nutmeg
    • Brown sugar
    • Stick butter
    • Small marshmallows

  • What You'll Do
    • Boil the sweet potatoes with the skin on until they are soft. You can test them by sticking them with a fork.
    • Next run them under cool water. Then peel the skin off, which will come right off just using your fingers.
    • Spray a 9 x 13 dish with cooking spray. Then cut the sweet potatoes into thin slices. Begin layering the potato slices in the baking dish. Each layer sprinkle with cinnamon, a little bit of nutmeg, brown sugar, and thin slices of butter. Add more layers and repeat the sprinkling process.
    • Bakes at 325° for about 30 minutes. 
    • Top with the marshmallows and broil until they are brown. This will happen quickly, so keep an eye on them!


Friday, November 14, 2014

Garlic Green Beans

Happy Friday!! The weekend is going to be fabulous, I can just feel it! Today I am sharing a long-time favorite of mine. My Aunt Jeanne makes these green beans and they remind me of the holidays at my Grandmom's house. Lately, I've been making these green beans a lot because they're so simple and so delicious! They are perfect any day, especially the weekends when you can let them cook on the stove top and the aroma fills your home! 


  • What You'll Do
    • Dice the onions then saute with the butter in a large saucepan. Sprinkle with garlic salt. 
    • Once the onions have become translucent, add JUST the juice from the green beans. Add the beef bullion cube. Let the juice come to a boil, then add the green beans. 
    • Bring that to a boil again, then cover with a lid and turn to low-medium heat to let simmer for two hours.
    • Salt and pepper to taste.


Thursday, November 13, 2014

Spinach & Mushroom Tart

Yesterday I didn't forget to blog a recipe, but simply ran out of time. Some days are like that, but to make up for a lack of recipes this week, I'm bringing your one of my absolute favorite appetizers today! 

I've been making this Spinach & Mushroom Tart for a little over a year now and I just don't tire of it! I love to serve this up as an appetizer when we have a group of friends over, before a meal, and like last year, on Thanksgiving Day while the rest of the food is coming together in the kitchen. Even those who don't love spinach nor mushrooms have gobbled up not just one, but multiple of these tarts. You just can't go wrong with it! 

  • What You'll Need
    • 16 oz/one carton of button mushrooms
    • 10 oz frozen, chopped spinach
    • 1/2 a medium onion, diced
    • 1/4 TSP (or more depending on taste) garlic salt
    • Olive oil
    • 1 egg
    • 1 cup ricotta cheese
    • 1/2 cup shredded Parmesan cheese
    • 1 cup shredded Swiss cheese
    • Salt & pepper to taste
    • Pepperidge Farm Puff Pastry (in a two pack)

  • What You'll Do
    • In advance set your spinach and puff pastry out to thaw. 
    • Start by dicing the onion and cutting the mushroom into small pieces. I rinse the mushrooms and remove the stem.
    • Drizzle olive oil in a skillet and add the onion and mushrooms, heating over medium heat. Season with garlic salt, salt, and pepper to taste. Sauté until the onions have become translucent. Then set aside.
    • In a mixing bowl, combine the ricotta and egg. Then add the Parmesan and Swiss cheese, mixing well. Salt and pepper to taste.
    • Once the spinach has thawed, squeeze out all the extra moisture by using a paper towel. Then add it the bowl of cheese mixture.
    • Next add the onion and mushroom mixture. Stir well.
    • On a greased baking sheet, spread out one and two-thirds of the puff pastry. You will need to stretch the dough out, but don't rip it or leave a hole. With the extra dough, make a border, again stretching it out to make it fit. If the extra dough isn't enough, use what you have stretched out flat. Pinch the border like you would the edge of a pie crust.
    • With a fork, make prick marks in the puff pastry so it doesn't rise too much in the middle.
    • Then spread out the mixture evenly, leaving space around the edge where you have created a pinched border.
    • Cook at 400° for 20 to 25 minutes or until the crust looks slightly browned.

**Double the recipe to make two for larger gatherings. 


Wednesday, November 5, 2014

Whipped Mashed Potatoes

Today is one of my favorites. Yep, mashed potatoes. This (and milkshakes) is my go-to comfort food. But, you have to make them just right to be delicious and after a ton of trial and error, I have finally discovered the magic needed to make the best mashed potatoes around. Let me introduce you to my friend, heavy whipping cream. It might not be diet friendly, but ya'll it makes any recipe taste like heaven. And that's no exception for this recipe. 

One of the best parts about mashed potatoes is its diversity to be paired with just about anything. Use it as the base for a creamed sauce or to scoop up your vegetables. Mashed potatoes are also a kid favorite, so these will be sure to please the entire family at meal time! 


**This recipe doesn't have specific ingredient measurements, so add everything slowly because you can't take away, but you can always add (thanks for that advice Mama).

  • What You'll Need
    • Golden potatoes
    • Stick butter
    • Milk (skim milk)
    • Heavy whipping cream
    • Salt and pepper to taste

  • What You'll Do
    • Peel and dice the potatoes. I dice my potatoes quite small so that they cook faster and because it helps to get smooth mashed potatoes
    • Boil the potatoes until tender in a large pot. Add salt. Then drain.
    • Put the cooked potatoes in a large mixing bowl along with one tablespoon of butter. With a hand mixer beat the potatoes on low, until they have broken up. 
    • Add a couple of dashes of milk. Beat again.
    • Once all the milk has been mixed with the potatoes add the heavy whipping cream. Several dashes at a time. Blend. 
    • Salt and pepper the potatoes to taste. 
    • Keep alternating heavy whipping cream and milk until the potatoes are smooth. You will use more whipping cream than milk. Taste as you go to make sure you get the desired taste you want. 


Here are some recipes for you to pair these whipped mashed potatoes with:

Wednesday, October 8, 2014

Spaghetti Squash Primavera

And so Feel Good Fall foods continue with a recipe I stumbled upon last January, Skinnytaste's Spaghetti Squash Primavera. Looking for a healthy option, this seemed fitting, but I felt skeptical about how it would turn out when I attempted to make it.

It turned out hearty and delicious, which surprised both husband and I considering the lack of carbs. The vegetables fill you up and leave you feeling full. You would never guess you didn't enjoy a meal without pasta. I think this recipe works because it's a casserole of sorts, and there's cheese!

If this is something that looks like it would never show up in your kitchen, I challenge you try it. Take a stab at making this primavera, you'll be pleasantly surprised, I guarantee it.


**We made slight variations to the Skinnytaste recipe, to work with what we already had in our kitchen and pantry.**
  • What You'll Need
    • 1 small spaghetti squash
    • 1 tsp olive oil
    • 1/4 TSP garlic salt
    • 1/4 cup red onion, diced
    • 1/4 cup celery, diced
    • 1/4 cup carrots, diced
    • 1 cup broccoli florets
    • 1/2 cup zucchini, diced
    • 2 cups homemade marinara sauce
    • 1/2 cup mozzarella cheese

  • What You'll Do
    • Preheat the oven to 400°. Cut the spaghetti squash in half lengthwise and scoop out the seeds and membrane. Sprinkle with salt and pepper, then turn cut side down on a baking sheet. Bake for about 40 minutes or until the squash is soft. 
      • You can microwave the squash for 7-9 minutes after stabbing the squash all over with a knife. It will be done when the skin gives when cut with a knife. 
    • Once cooked, scoop out the now stringy squash, until you have 2 cups worth.
    • While the squash is cooking, cut up all the vegetables and make the quick homemade marinara.
    • In a medium sauce pan on medium-low heat, add the red onion, celery, carrots, and garlic salt, cooking for 5 minutes and stirring frequently. 
    • Then add the broccoli and zucchini and season with pepper and salt to taste.
    • Add the marinara sauce and increase heat to medium and simmer until the vegetables are tender crisp, about 3-4 minutes. Add the 2 cups of spaghetti squash and stir.
    • Put the vegetable mixture into a casserole dish and sprinkle the mozzarella over it. Place in the oven until the cheese melts. 


Monday, October 6, 2014

Pan-Seared Brussels Sprouts With Dried Cranberries & Sunflower Seeds

This week is the second of five weeks for themed recipes, all inspired by October. The next five days are all about cozy, feel good fall foods. With rainy weather and low temperatures, these recipes will be a great for warming up your belly. I wanted to kick this week off with a favorite side dish of mine, pan-seared Brussels sprouts with dried cranberries and sunflower seeds.

I fell in love with Brussels sprouts several months back, but felt that they needed a little extra texture and flavor. That's how I decided to add dried cranberries (a favorite of mine) and sunflower seeds. When coming up with new recipes, one of the greatest ways to pick ingredients to add to a basic dish is to start with what's already in your pantry. We keep dried cranberries and sunflower seeds in stock at our house, and turns out they make a great addition to your typical vegetable. 

  • What You'll Need
    • A bag of fresh Brussels Sprouts (not frozen)
    • Dried cranberries
    • Sunflower Seeds
    • Garlic Salt
    • Olive Oil

  • What You'll Do
    • In a skillet, swirl around about one tablespoon of olive oil. Put on low to medium heat.
    • Wash the Brussels sprouts then cut off the end. Next chop them into the bite sizes you prefer. I cut mine twice to get four pieces per Brussels sprout.
    • Add them to the skillet along with a sprinkling of garlic salt. Let them cook until they begin to brown. 
    • Once the Brussels sprouts are almost done, add the dried cranberries. Add as many as you'd like. Typically, 1/4 cup or less. 
    • Then add the sunflower seeds, as many or as little as you'd like. 
    • Stir well and add just a dash more of garlic salt if desired. Remove from heat and serve once the cranberries and sunflower seeds have had time to warm. 


Thursday, September 11, 2014

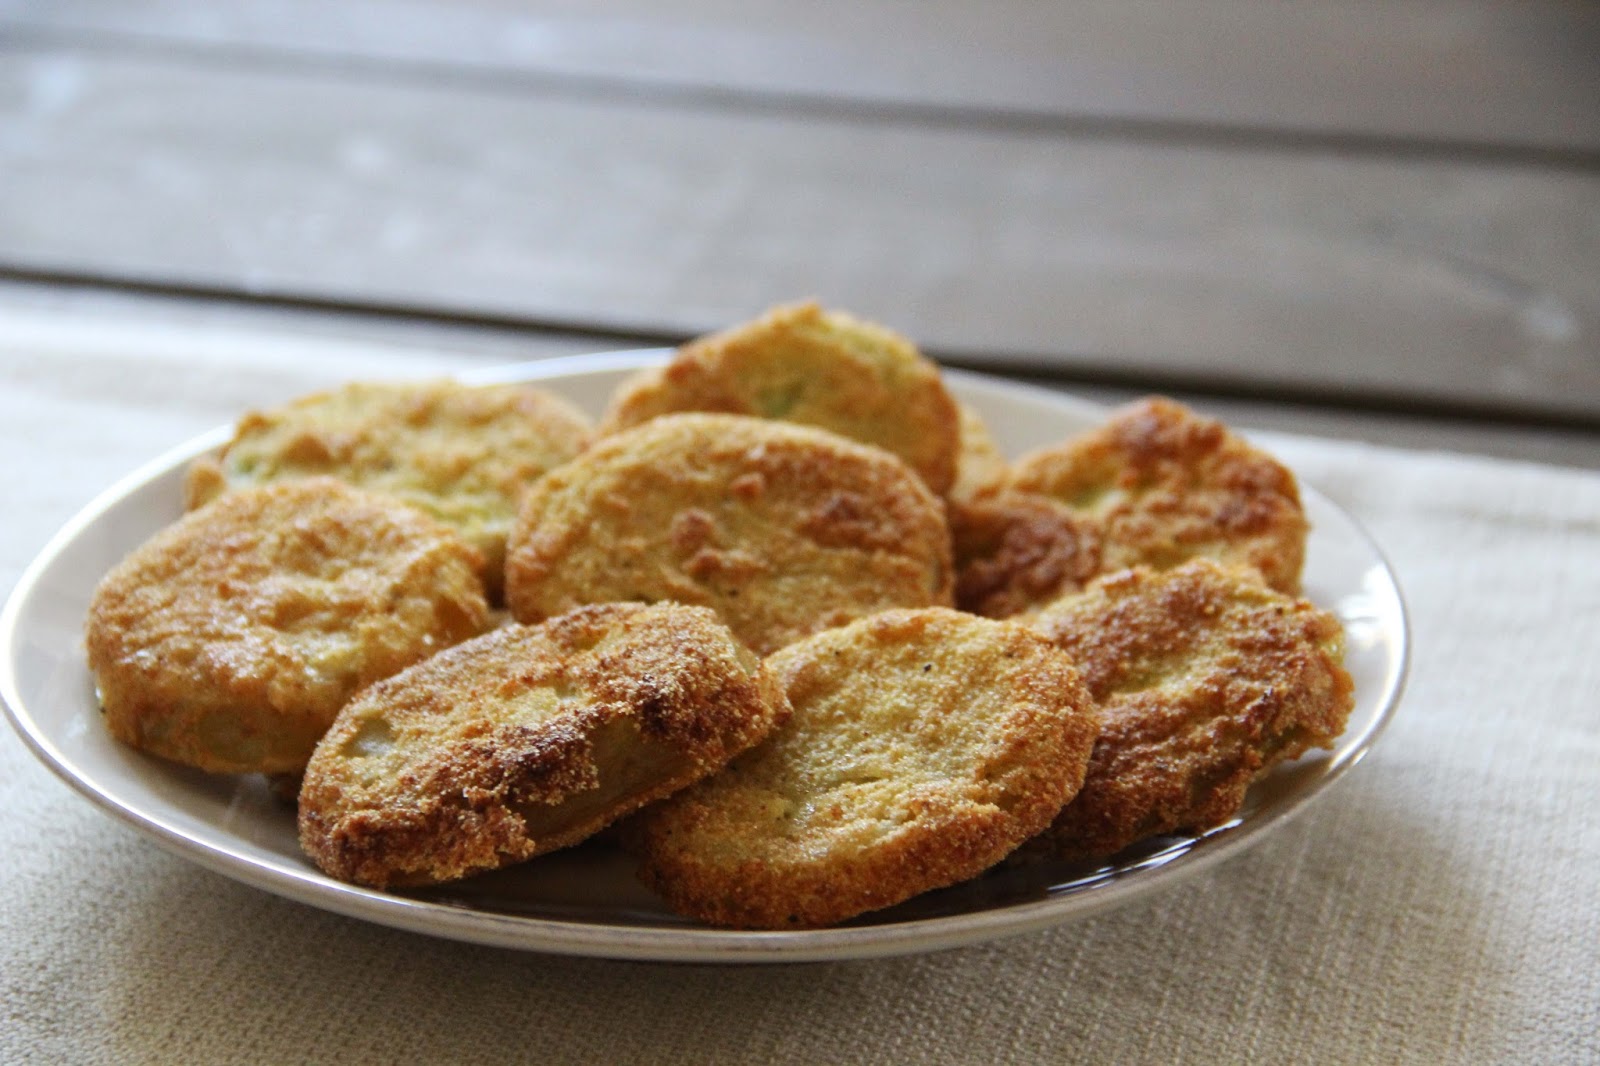
Fried Green Tomatoes

This was the very last recipe that I posted on Hill Collection. And because it is a summer treat, it had to be included in the summer wrap-up of recipes going on this week. 

It wasn't until late this summer that I had my first fried green tomato. I know, how had that not happened already? Honestly, I just don't know, because my dad grew and stills grows tomatoes every summer. Doesn't add up, does it?!

So when he called to say he had straight-out-of-the-garden green tomatoes I jumped, waving my hand in the air, "Me. Me. Me. I'll take them." I got to thinking about how exactly I would coat them and fry them. And this is how it turned out. Tooting my horn *toot, toot* they were delicious! You must make these. 

 ^^I think tomatoes are just beautiful. Their color is so vibrant and bright.^^


  • What You'll Need
    • 3 medium green tomatoes
    • 1/2 cup all-purpose flour
    • 1/4 cup yellow cornmeal 
    • 1/4 cup plain bread crumbs
    • 1 TSP kosher salt
    • 1/4 cup milk
    • 1 egg
    • Canola oil for frying

  • What You'll Do
    • Slice the tomatoes about a half an inch thick. 
    • In a small bowl whisk the egg and milk together. On one plate, put the flour. On a second plate, stir the cornmeal, crumbs, and salt.
    • Dip each tomato slice into the flour and coat thoroughly. 
    • Transfer to the egg and milk mixture. 
    • Dredge the covered tomato in the cornmeal mixture.
    • In a large skillet, heat the canola oil on medium (should be 1/2 an inch deep in the pan). Place the coated tomato slices in the oil. Flip them once they brown. 
    • Drain them on a paper towel covered plate. 


These crispy bits of heaven were so easy to make and I am on the hunt for more green tomatoes, but as summer comes to a close, that might be far and few between. And might I add that you simply can't eat fried green tomatoes without watching the movie. That would be absurd. Now go find yourself some green tomatoes! Summer is almost over and gardens are starting to close shop! Run, quick! 


Related Posts Plugin for WordPress, Blogger...